Wallpaper (cloth) construction edition│AGLUCA, an apparel company in Yamanashi
We will introduce the process of pasting cloth in a sewing factory (corner base reinforcement, top coat putty, gluing to wallpaper (cloth), and pasting wallpaper to the wall).
In another article, we will show you how to install putty and mesh (fiber tape) before pasting the cloth .
This article is a continuation of that/introducing the next steps.
◼︎Prerequisite information
・Purchased a used cast concrete (RC) property in Shiotsu, Uenohara City, Yamanashi Prefecture.
・The first floor, which was originally a warehouse and parking lot, will be renovated to create an apparel sewing factory.
・Since there is no insulation or secrecy, and the performance of the original windows and sashes is low, we aim to make the building highly airtight and highly insulated through renovations to create a comfortable working environment.
・Request to a local construction company in Uenohara City
◼︎Other articles introducing the process of establishing a garment factory
・Wall construction sashes and windows, moisture-permeable waterproof sheets
・Construction of ceilings, ventilation systems, electrical piping, and air conditioning
・Wall insulation/secrecy and toilet piping edition
・Floor installation (standing floor / double floor method) and floor insulation
・Electrical wiring and air conditioner piping
・Construction of plasterboard and cross base plywood on the wall
・[Floor/wall construction continued] Installing plywood on top of particle board
- Installation of putty and mesh tape before pasting wallpaper (cloth)
The wallpaper (cross) has been delivered.

When you take it out of the brown bag, it looks like toilet paper like this

The wallpaper color was selected from the sample (booklet) of Lily Color Base LB (2020-2022)
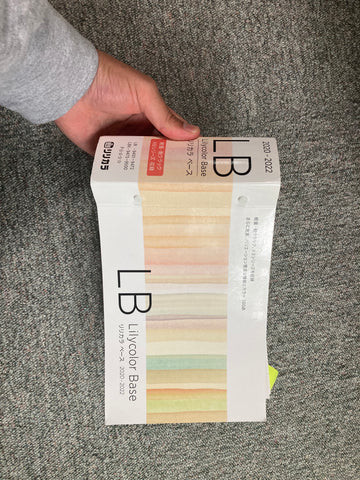
Out of about 100 colors, we chose LB9458 for the wallpaper in the sewing factory.

It is light gray.
I'm looking forward to seeing how different it looks when I see it in the sample and when I actually put it on.
Here we will introduce the flow of wallpaper construction.
We will install corner base reinforcement material made of ABS composite resin material at the corners of the wall.

Non-PVC corner base reinforcement material NKA Corner

This is what it looks like from another angle. We will install this at the corner of the wall where the cross will be pasted.
Corner base reinforcement material was applied to the corner and putty was applied over it.

The undercoat putty has been applied in the previous step.
On top of that, we will apply another layer of ``top coat putty.''
The putty used is Yayoi Chemical Industry's SUPER Scheme L (for top coating).

Use the white putty as an undercoat and apply the topcoat putty over it to get a beige color.

The top coat putty is a color similar to plasterboard.
Once the corner base reinforcing material, mesh tape (fiber tape), undercoat putty, and topcoat putty have been applied, the final step is to apply the wallpaper (cloth).
Glue is applied to the wallpaper using Kyokuto Sanki's automatic wallpaper gluing machine Hiβ.

Add glue to the glue machine.
For the glue, use 2 types of starch adhesive for wallpaper construction, No. 2 Wall Bond 100.

Installing the wallpaper and blue nylon tape on both ends in the automatic gluing machine

Blue nylon stays on both ends, and all the back sides of the wallpaper are glued and come out in a different state.

We will mass-produce wallpaper with glue by folding the glued sides together.
When you put it into the automatic gluing machine, the edges (edges) on both ends of the wallpaper will also be cut off automatically.

After the scraps (ears) on both ends are removed, blue tape is attached to both ends.

1. Cut off the ears on both ends of the wallpaper.
2. Apply glue evenly to the entire back of the wallpaper,
3, Attach blue tape to both ends
*The machine will automatically perform steps 1 to 3.
4.Fold the pasted sides together.

Now you are finally ready to put up your wallpaper.
Once the top coat putty has been applied and has dried, smooth out any slight irregularities on the surface.

I heard that some companies use a sander to sand down the putty until it is flat.
Apparently, it's better to flatten it with your hands because you won't scrape too much of the putty and the wallpaper will be less likely to peel off later.
After preparing the wallpaper and leveling the wall, you can finally apply the wallpaper.

The blue tape on both ends is removed at the end of the process.

When a craftsman applies a lot of steps to apply wallpaper, the result is a beautiful finish where you can't see the boundaries between the two cloths.
At our sewing factory, the wallpaper was pasted by a craftsman with over 30 years of experience.

Wallpaper (cloth) Lilycolor base light gray (LB9458) installation example *Work in progress

Although the wallpaper is priced at 1,000 yen, it does not look cheap at all due to the color of the ceiling and pillars, the color of the cloth selected, and the skill of the craftsmen.